


Garage Floor Tiles for Detailing Bays: A Setup Guide
Garage Floor Tiles for Detailing Bays: A Setup Guide
A detailing bay is a wet room that happens to hold cars. Water arrives by the hose and by the bucket, chemicals arrive in spray bottles, and the floor takes all of it — every working day, not once a season. That is why the floor is usually the first upgrade that changes how a detailing setup feels to work in and to walk into as a customer.
This guide covers how to plan a bay around garage floor tiles: what the floor actually has to cope with, which tile format belongs in a wash zone, how to lay the bays out so water leaves the room, and the mistakes that only become obvious after the first fit-out.
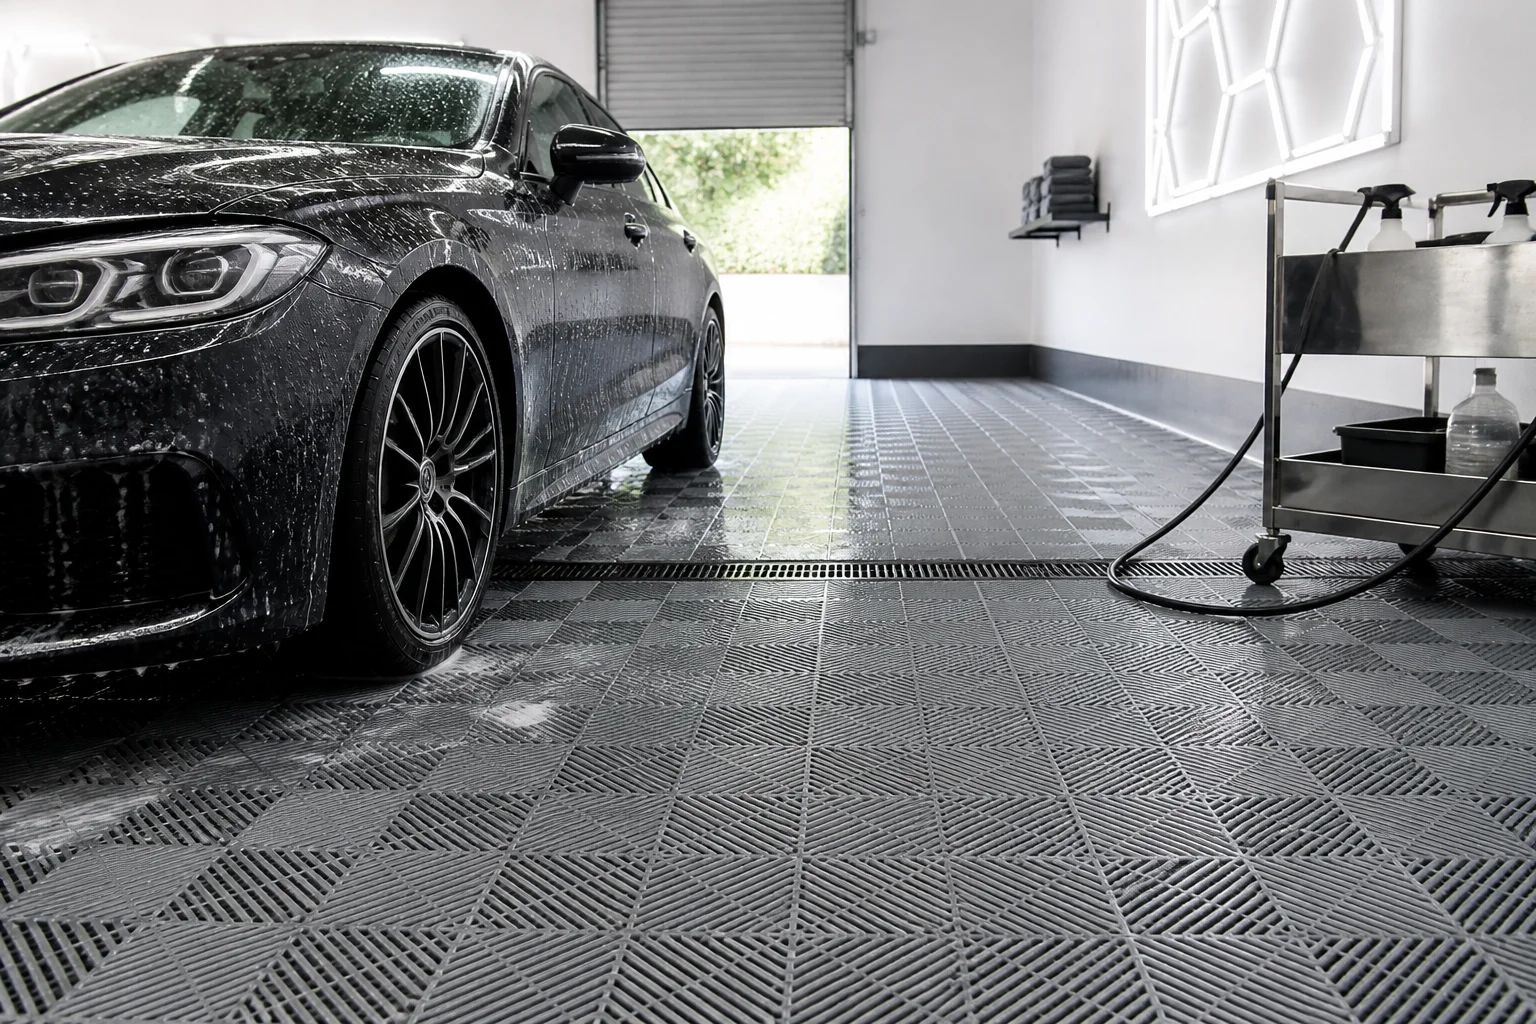
What a Detailing Bay Asks of a Floor
Constant water, not occasional spills
The difference between a domestic garage and a detailing bay is volume. A domestic floor sees rain off one car; a bay sees rinse water, foam, wheel cleaner and bucket runoff all day. A floor that pools water turns every job into a cleanup, and standing water is also where a slick surface becomes a safety question at the end of a long shift.
Interlocking tiles handle this in two ways. The solid-ribbed base raises the tile off the slab so water that reaches the seams can travel and evaporate instead of sitting in a film underfoot, and a perforated tile in the wet area lets water pass straight through. If most of your work is driveway-style washing rather than a fixed bay, our guide to floor tiles for home car washing and detailing walks through the lighter-duty version of the same setup.
Chemicals that sit on the surface for minutes
Wheel acid, traffic-film removers, degreasers and tar solvents are all designed to break down whatever they touch. On a porous surface they soak in; on a PVC tile they sit on the surface and rinse away. That is the main reason tiles stay presentable in a working bay long after a bare slab has taken on a permanent grey-brown patina. Stubborn compound residue and dried tar still need a method rather than a scouring pad — removing tough stains from garage floor tiles covers that without damaging the surface.
Point loads and rolling loads
A detailing bay is not a parking space. Jacks, axle stands, creepers, rolling stools, pressure-washer trolleys and wheel dollies all concentrate weight onto small contact patches, and they roll rather than sit. The relevant question is not only what the floor can support, but how it behaves when something heavy and narrow moves across it. Our breakdown of garage floor tile weight limits explains what those loads mean in practice.
Customer-facing appearance
Detailing is a visual service. The customer judges the work by the bay they see when they drop the car off, before a single panel has been corrected. A clean, evenly laid floor sets the expectation for the finish — and it photographs properly, which matters more than ever for social media and before/after content. If you are weighing the spend against what it returns, are garage floor tiles worth it works through the honest version of that calculation.
Solid or Perforated? Matching the Tile Format to Each Zone
Most busy bays end up with more than one tile format, because the requirements change as you move through the building.
| Zone | Tile format that suits it | Why |
|---|---|---|
| Wash bay / wet area | Perforated tile | Water passes straight through to the slab and away, instead of travelling across the working area |
| Decontamination and rinse-off | Perforated or solid with open seams | Heavy water volume plus chemical runoff that needs an escape route |
| Polishing and drying bay | Solid tile | Dry, stable, comfortable underfoot for hours of machine work |
| Staging and customer handover | Solid tile in a deliberate pattern | Reads as a finished, professional space and photographs well |
| Equipment and storage corner | Solid tile | Protects the slab where trolleys and cabinets are dragged around |
Colour choice is part of the same decision: a mid-tone grey or a charcoal/light checkerboard hides tyre marks and water spotting far better than a very dark or a very light floor. Our colour guide covers how the palette behaves under work lighting.
Planning the Layout So Water Leaves the Room
The single most valuable hour you will spend on a bay is the one spent drawing the water's route out of the building. Work through the bay in the order a car does:
- Entry and staging. Where the vehicle arrives, gets checked in and waits. This floor needs to survive wet tyres and road salt.
- Pre-rinse and wash. The wettest zone. Perforated tiles plus a drain, ideally with the floor falling gently toward it.
- Decontamination. Chemical work close to the drain so runoff has the shortest possible journey.
- Correction and polishing. Dry, comfortable, well lit — this is where staff spend the most hours on their feet.
- Handover. The bay the customer actually stands in. Keep it dry and tidy, and make sure it is the best-lit floor in the building.
Lay the tiles so the perimeter gap stays clear all the way round. Covering a floor with nowhere for moisture to breathe is what turns a manageable damp slab into a problem — the same principle as laying over an old or uneven base, which our uneven concrete FAQ deals with in detail.
Drainage: Get It Right the First Time
Drainage is the one part of a bay that cannot be quietly fixed later, because it sits under everything else. Three decisions matter:
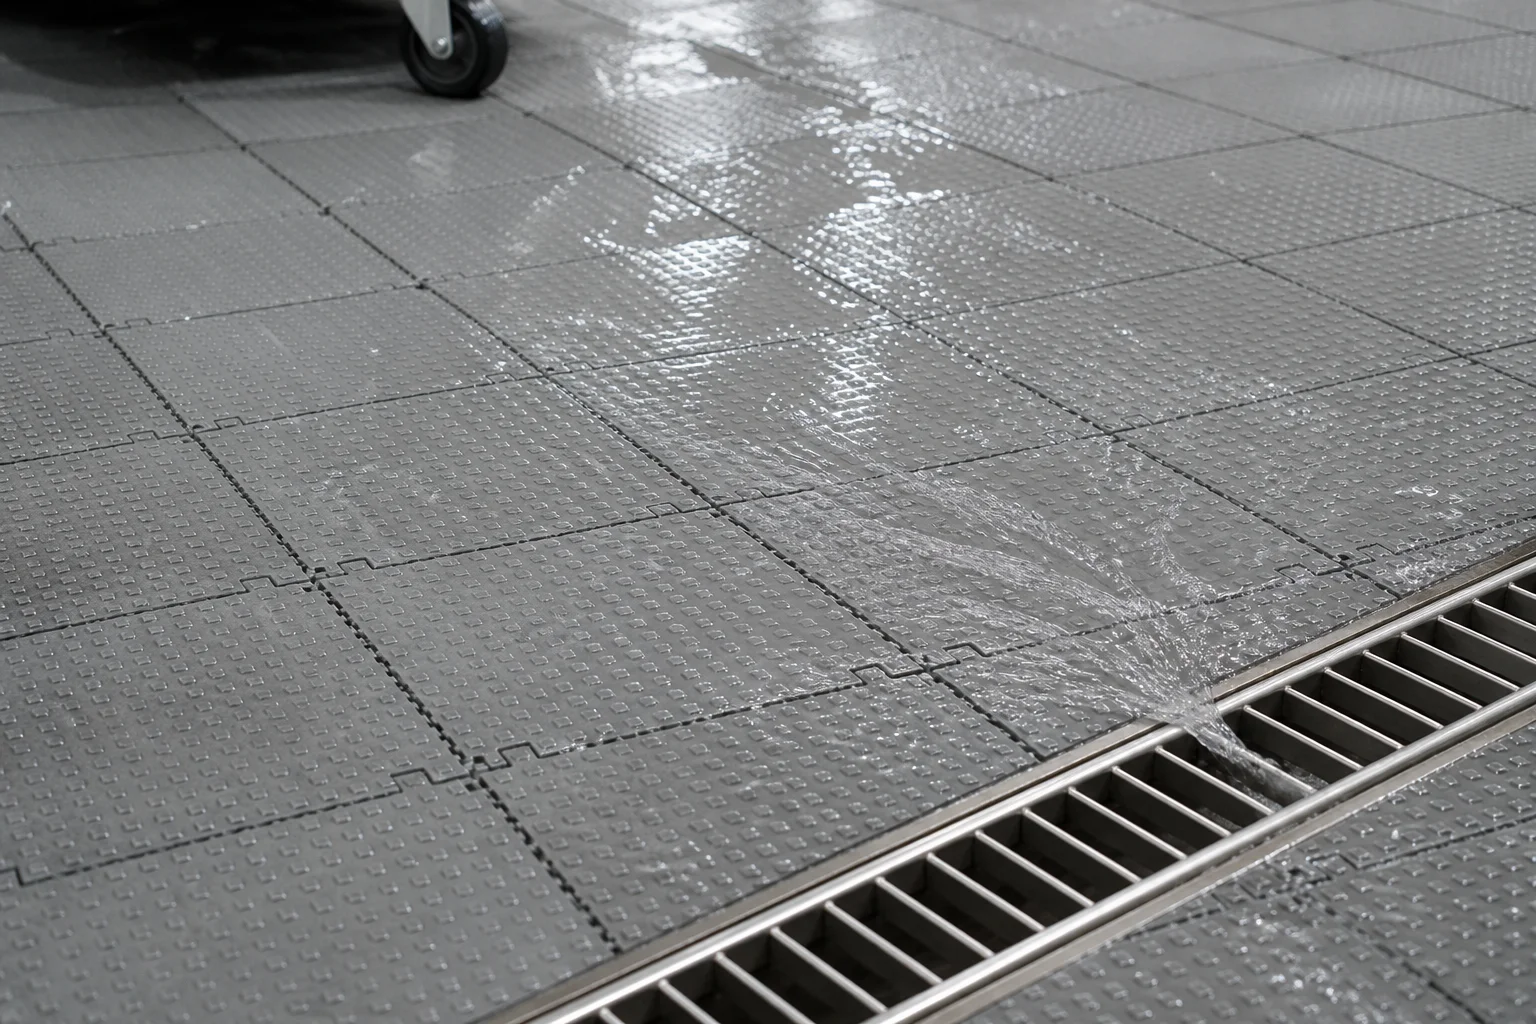
- Where the channel runs. A linear channel across the bay is easier to work with than a single point drain, because water reaches it from more of the floor.
- How the floor falls. The tiles follow the slab, so if the slab is flat, water will only move when it is pushed. Check the fall before you commit to a layout.
- How the channel is covered. A stainless grille with a removable basket keeps the bay usable while still being easy to clean out.
If the existing slab already has a drain, plan the bay around it rather than fighting it. If it does not, an above-ground solution is not a compromise — a modular floor with a defined wet zone still beats an unplanned one.
Lighting, Walls and the Rest of the Fit-Out
A floor and its lighting are effectively one decision, because the floor is what the light bounces off. Inspection work needs even, shadow-free light — which is why a modular LED panel arrangement over the working bay pays for itself in fewer missed defects. Choose floor colour with that light in mind, not with a showroom photo.
Beyond the floor, the upgrades that show up in most serious bays are a wall-mounted pressure-washer and hose reel, a drying area with forced air, chemical storage that keeps bottles off the working floor, and slatwall or rail-mounted tool storage so the floor stays clear. Our workshop flooring guide covers how that layout logic changes in a general-purpose space rather than a dedicated bay.
Five Mistakes That Only Show Up in the Second Fit-Out
- Choosing the tile colour before the lighting. Lighting changes how every grey reads. Pick the floor under the light you will actually work in.
- Laying tight to the walls. No perimeter gap means no route for moisture to escape.
- Buying for the showroom and not for the wet zone. A beautiful solid floor in the wash bay just means water travels further before it finds a way out.
- Ignoring how things roll. Creepers, stools, dollies and jack wheels behave differently on an open-seam base than on a sealed coating.
- Treating the drain as an afterthought. It is the cheapest part of the project to get right at the start and the most expensive to correct afterwards.
Tiles Versus Coatings in a Wet Bay
Coatings look convincing on day one, and in a dry workshop a good one lasts well. In a wet bay the difference is maintenance. When a coating fails — a hot tyre patch, a dropped tool, a chemical burn — the repair is another coating job over the whole area, and the bay is out of service while it cures. A tiled floor lifts and replaces in sections, which means a damaged tile costs you minutes rather than a shutdown. If you are already comparing systems, our installation over an existing epoxy floor guide covers the transition directly.
Common Questions
Can I install tiles over an existing coated or painted floor?
Usually yes, provided the existing surface is sound and the coating is not flaking. Tiles are not glued down, so they do not trap the old surface underneath — but they do need a stable base. Check for loose areas first.
Do tiles need sealing in a wash bay?
No. PVC tiles are not porous, so there is nothing to seal. What matters is keeping the seams and the perimeter gap clean enough to drain.
Can I use a pressure washer on a tiled bay floor?
Yes, at sensible settings and working in sections, with the nozzle kept at a reasonable distance. Our pressure washing guide lists the settings that avoid lifting an edge.
How long does a bay take to install?
For most single-bay setups, a weekend is realistic once drainage is in place. The one-weekend installation guide sets out the sequence, and the obstacles guide covers cutting in around lifts, posts and drains.
The Bottom Line
A detailing bay lives or dies on how it handles water. Decide the wet zone first, give the water a slope and a drain to reach, keep the perimeter clear, then choose the tile format and colour that suit the light you work under. Done in that order, the floor stops being a maintenance item and starts being part of the service you sell.
Planning a bay and not sure which tile format suits your wash area? Tell us the size of the space and how you use it, and we will point you at the right layout — start with our garage floor tiles range, or contact us with your bay dimensions.


