


Garage Floor Tile Edging and Ramps: A Buyer's Guide
Garage Floor Tile Edging and Ramps: A Buyer's Guide
Most people planning a garage floor project spend their time on the tiles — thickness, colour, pattern, material — and almost none on the pieces that finish the job. Then the floor goes down, the middle of the garage looks excellent, and something still feels unfinished: the open edges along the walls and the lip a car has to climb at the door.
Edging and ramps turn a pile of interlocking panels into a floor that looks built-in — and they are the items most often forgotten until installation day.
Why the Small Pieces Matter

Three problems show up the moment an unfinished tiled floor is used:
- Open edges move. A tile at the end of a run has nothing holding its outward-facing connectors, so it creeps, gaps open, and dirt collects.
- The door threshold becomes a step. A 12-18 mm lip means every car, trolley and wheelbarrow has to be pushed over it, wearing the edge and rattling the floor.
- Water runs off the wrong way. An open edge lets meltwater escape sideways into the wall junction instead of out at the door.
None of it is dramatic, but all of it separates a finished installation from loose tiles.
The Four Finishing Pieces You Will Need
1. Edge Trim (Wall Edging)
Edge trim is a long, straight profile that clips into the connectors along the outer run of tiles. It replaces the exposed tile edge with a smooth vertical face and, crucially, locks the last row so it cannot creep.
It is almost always needed, and it is the piece people forget most often. Measure every open tile edge — walls, posts, and anywhere the floor stops short of a fixed surface.
2. Door Ramps and Threshold Ramp Segments
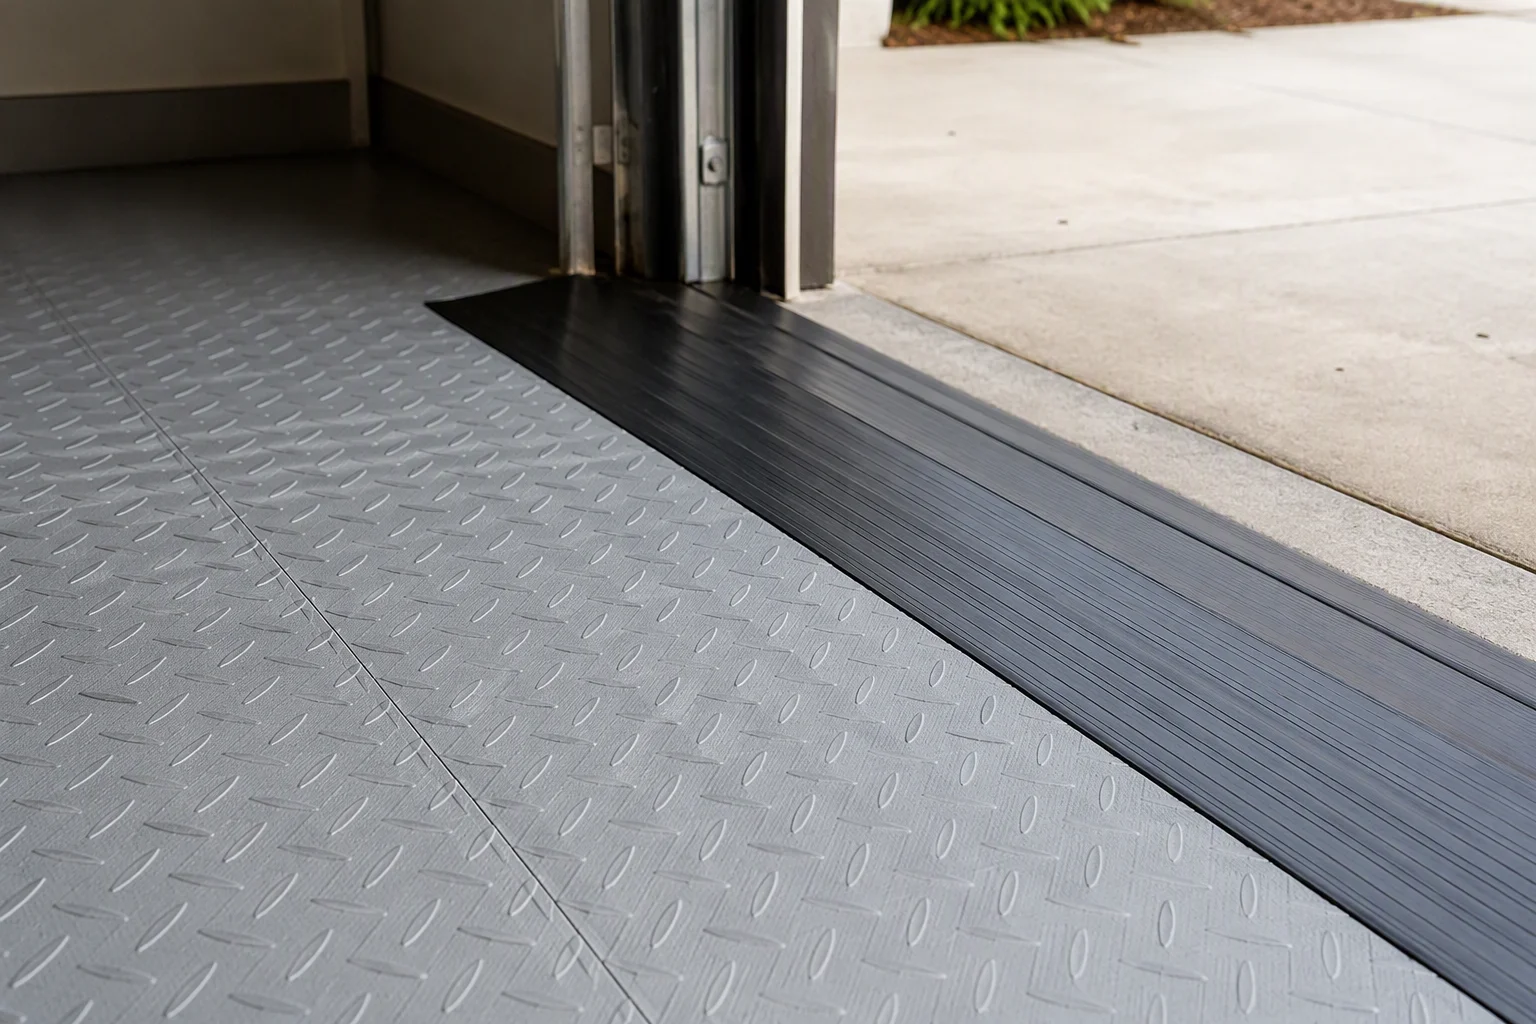
A ramp converts the height difference between the tile surface and the driveway into a gentle slope. Most manufacturers offer ramp kits that clip onto the tile edge at the door and across the sill, or full-width ramp sections where the whole opening needs to be covered.
This piece decides whether the floor feels like part of the garage or an obstacle in it.
3. Corner Pieces
Where two runs of trim meet at a right angle, a corner piece joins them so there is no exposed end or mitre to line up. Corners are sold separately because there is no way to make a straight trim length turn.
4. Transition Strips
Where the garage floor meets a different surface — a paved apron, a raised platform, a doorway into the house — a transition strip bridges the two levels. It is the same idea as a ramp, sized for a person walking across rather than a tyre.
Obstructions inside the garage — posts, steps, inspection covers — often need the same treatment, and the techniques are covered in our guide to installing garage floor tiles around obstacles.
How to Measure Before You Order
Trim and ramps are sold by the metre or by the piece, and the cost adds up quickly if you guess. Measure deliberately:
- Walk the perimeter with a tape and note every open tile edge — including short returns beside posts and steps.
- Add the lengths together and order the nearest longer size. Most trims are cut to length with a fine-tooth saw.
- Measure the door opening width, then add a little for the slope run. A ramp must reach down to the driveway surface, not stop in mid-air.
- Note the tile thickness at the edge: trim made for 12 mm tiles will not seat on an 18 mm floor.
- Count the corners where two trims meet, plus any outside corners around posts.
- Add one spare length of trim if you have never cut this material before.
Why Tile Thickness Decides Everything
Trim and ramps are matched to tile thickness rather than to tile size, so the choice has to be made after the floor specification is settled. Our garage floor tile thickness guide walks through how thickness affects load capacity, echos and the height of the threshold you will need to bridge.
Planning the tile count and the trim count in the same session saves a second order later. If you are still working out quantities, our guide to how many garage floor tiles you need covers the arithmetic, including the cut allowance.
Choosing Ramp Style and Material
| Piece | What it does | What to check before buying |
|---|---|---|
| Wall edge trim | Closes and locks the outer tile run | Matched to panel thickness; enough length for every open edge |
| Door ramp kit | Slopes the tile down to the driveway | Slope run long enough to reach the outside surface |
| Full-width ramp | Covers the whole opening in one piece | Opening width, plus the drop across the sill |
| Corner piece | Joins two trims at 90 degrees | Inside versus outside corner |
| Transition strip | Bridges to another floor surface | Height difference on each side |
Plastic, Rubber or Aluminium?
Trim and ramp options mostly come down to three materials, and each behaves differently in a garage:
- Matching plastic or PVC. The usual choice. It matches the tiles visually, clips in without tools, and flexes with the floor. Cheapest and easiest to cut.
- Rubber. Quieter under tyres and slightly more forgiving on a slab that is not perfectly flat. It does not match the tile pattern, so it reads as a deliberate edge.
- Aluminium. Rigid, hard-wearing and the neatest option at a busy threshold. It costs more and must sit on a genuinely flat surface or it will rock.
For most residential garages, trim that matches the tiles along the walls plus a rubber or plastic ramp at the door is the sweet spot. Aluminium earns its cost at a workshop entrance or a very busy threshold.
Full-Width Ramp or Localised Ramp?
A full-width ramp covers the entire door opening. It looks tidy, but it is a single long piece that has to be measured properly.
A localised ramp sits only where the wheels cross. It costs less, fits more easily, and can be repositioned — but the rest of the threshold keeps its step, which matters if you also wheel a trolley across it.
Fitting Tips That Save an Afternoon
- Fit the trim as you go, not afterwards. Trim clips into the tile connectors; adding it later means lifting the outer run again.
- Leave the trim until the slab is dry and clean. Grit trapped under a ramp becomes a rattle. Our guide to preparing a garage floor before installation covers the cleaning order.
- Cut trim with the profile supported. A fine-tooth blade and a steady support block prevent the face from chipping.
- Work in the warm part of the day in winter. Cold plastic is stiff and clips are much harder to seat, as we note in our guide to installing garage floor tiles in cold weather.
- Check the ramp against the real wheel path. Cars track wider or narrower than owners expect, and a ramp in the wrong place is worse than none.
- Do not rely on trim to fix an uneven slab. If the floor rocks at the edge, the slab is the issue — our FAQ on tiles over uneven concrete explains what needs levelling first.
A Buyer's Checklist
- Total length of open tile edges, in metres
- Tile thickness at the edge, in millimetres
- Door opening width, and the drop from tile surface to driveway
- Number and type of corners (inside or outside)
- Any transitions to other floor surfaces
- Material choice: matching plastic, rubber or aluminium
- Ramp style: full-width or wheel-path only
- One spare trim length, and a fine-tooth blade for cutting
The Bottom Line
Edging and ramps are a small line item that decides how the whole floor reads. Trim along the walls stops the outer run from creeping, corners keep the joints neat, and a ramp at the door removes the step that would otherwise be there every day for the life of the floor.
Measure the open edges and the threshold before you order, match everything to the tile thickness, and fit the trim as you lay the floor. Do that and the floor stops looking like loose tiles and starts looking like part of the building — the whole point of a garage makeover.
To match trim, ramps and corners to a specific tile, start from the arlott.cn garage flooring range.


