


How to Install Garage Floor Tiles Around Obstacles
How to Install Garage Floor Tiles Around Obstacles
Real garages aren't empty rectangles. There's a support post in the middle, a floor drain under the car, a workbench bolted to the wall, and a step up to the house door. That's exactly why some owners hesitate to install garage floor tiles — and it's also the reason tiles are the best choice, because unlike poured coatings they can be cut and fitted around anything.
Here's the complete approach to installing around obstacles, with clean cuts and no lifted corners.
Plan Around Obstacles Before You Buy
Obstacles change your material count, not your ability to install. Two planning steps save hours later:
- Measure each obstacle's footprint and sketch it on your layout, including clearance for doors and drawers that open
- Order 10-15% extra tiles when obstacles are involved — cut pieces can't always reuse offcuts, especially around round posts and drains
If cutting is part of your plan, thickness matters: thicker tiles hold a cleaner edge and tolerate more handling. Our thickness guide covers which grades cut cleanly by hand versus needing power tools.
Tools for Cutting and Fitting
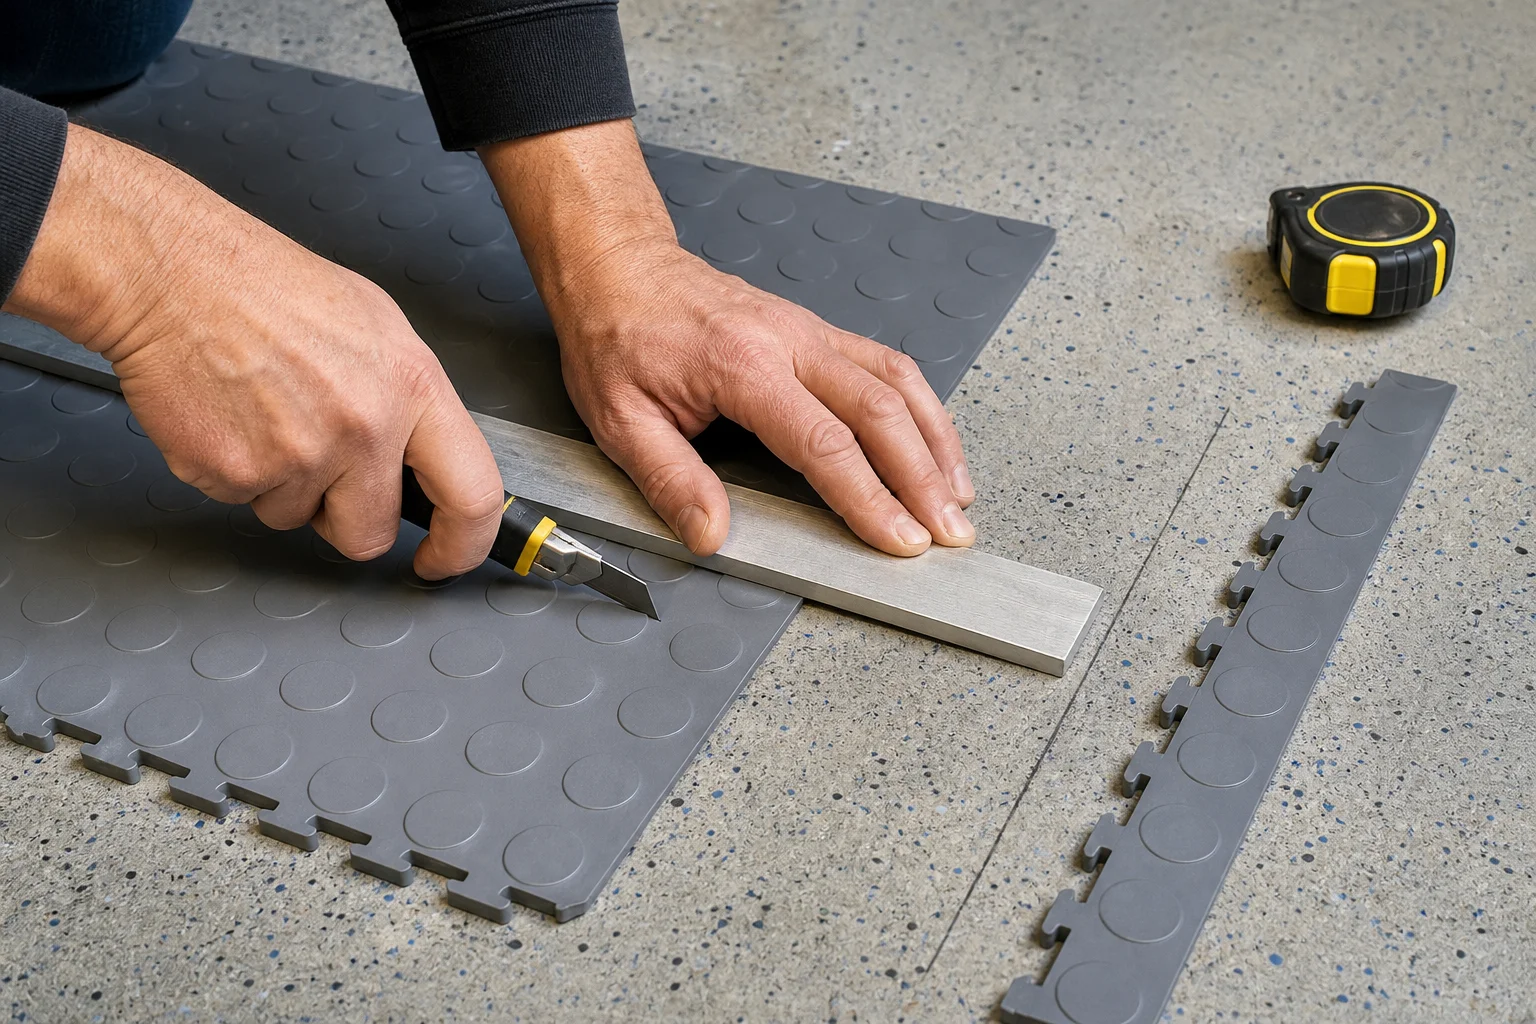
- Utility knife with fresh blades — works for most polypropylene tiles on straight cuts
- Hand saw or jigsaw — for thicker tiles or tight curves around posts
- Straight edge and pencil — mark once, cut once
- Rubber mallet — seats cut pieces without damaging the connector tabs
- Knee pads and gloves — you'll spend more time on the floor on this job
Around Posts and Columns
Support posts are the most common obstacle and the easiest to handle:
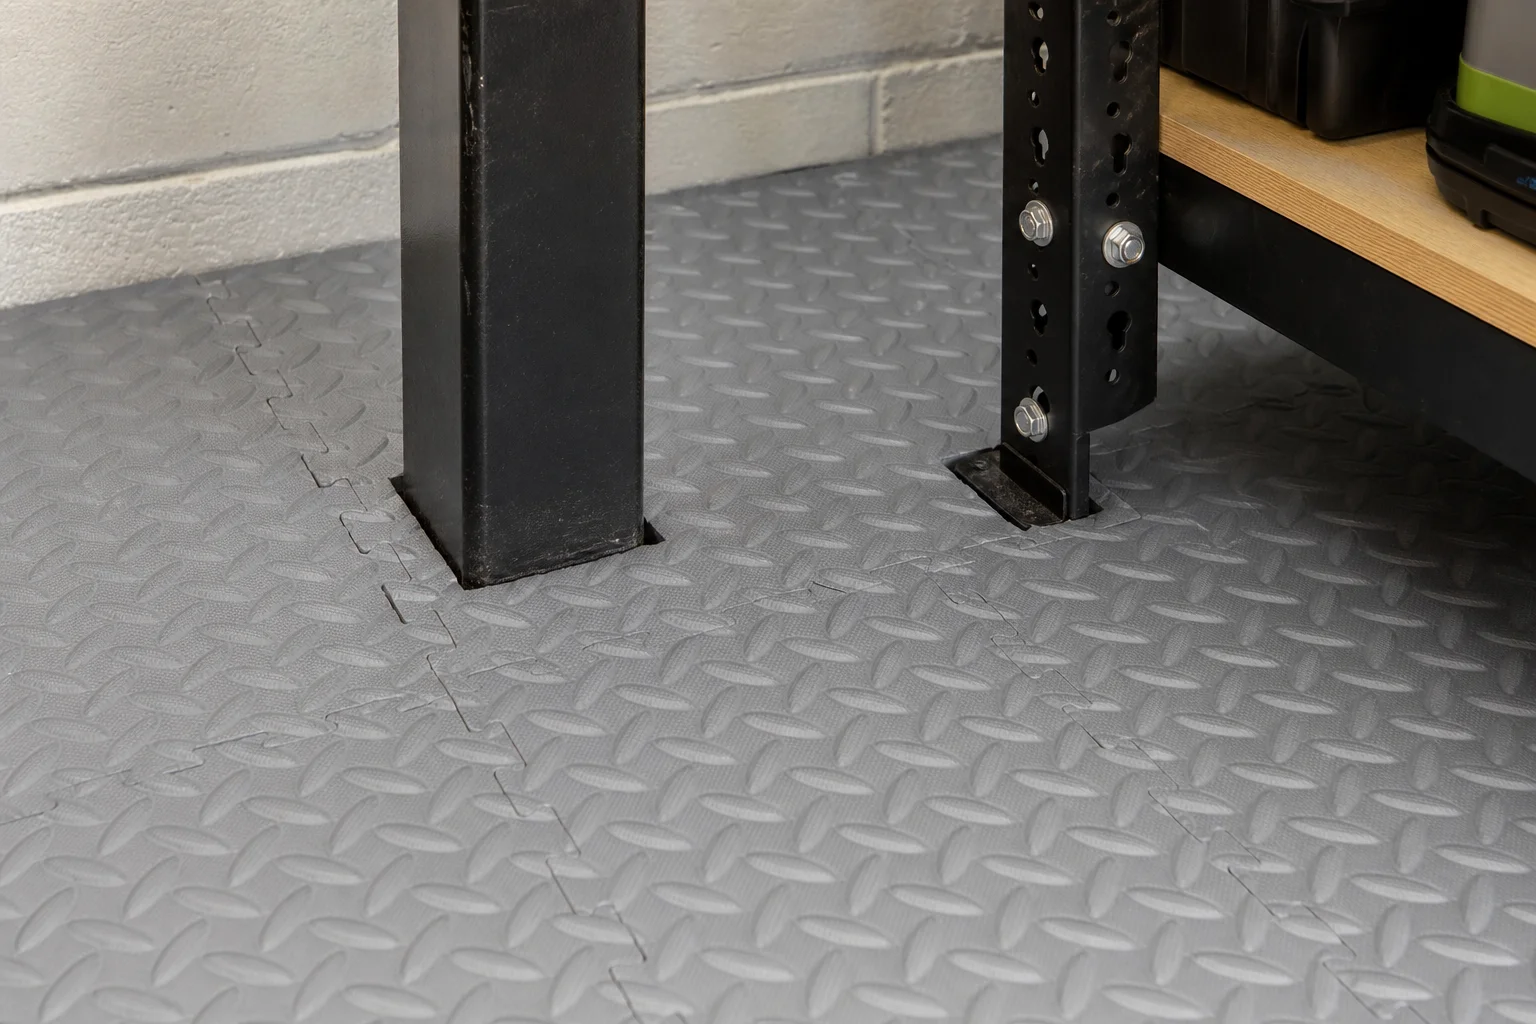
- Work outward from the post in a skirt — fit the four tiles touching the post first, cutting each to the post's shape
- Leave a 3-6 mm expansion gap between the tile edge and the post, so seasonal movement doesn't buckle the rows
- Fill in the rest of the field toward the walls, which means all remaining cuts land on straight runs
For round posts, template with cardboard or heavy paper before cutting the tile — one test fit beats three ruined tiles.
Around Floor Drains
A drain under the car is a feature you want to keep functional:
- Lay tiles up to the drain edge and mark the opening precisely from underneath or with a paper template
- Cut the opening 3-5 mm inside your mark, then trim to fit — it's easier to remove material than to add it
- Keep the grate accessible so you can still lift it for cleaning; don't seal a drain under a floor you can't open
If the drain sits exactly on a seam, offset your starting row so a single tile carries the opening rather than a joint.
Around Fixed Workbenches and Cabinets
Anything bolted down — benches, shelving uprights, water heaters — should be tiled up to, not around the entire footprint. The practical order:
- Tile the whole floor first where possible, then set the bench on top of the finished surface
- If the bench is already installed, cut tiles to fit snugly against its legs and back edge
- Finish exposed cut edges with a trim strip or a border row for a deliberate look — see how a workshop setup handles edges and transitions
Edges, Thresholds and the Garage Door
The perimeter decides whether the job looks professional:
- Garage door threshold: leave the tile edge slightly proud, then add a rubber or aluminum ramp strip so tires don't catch the lip
- House door threshold: cut tiles to the door line and fit a transition strip to bridge the height difference
- Walls: a 5-10 mm gap covered by baseboard or a border tile absorbs movement and hides imperfect cuts
Common Mistakes to Avoid
- Starting at a wall — you'll push every cut to the far side and get a visible taper; start from the most visible line or an obstacle's center
- Cutting tiles too tight — no expansion gap means buckling on hot days
- Forgetting the connectors — cut edge pieces still need tabs engaged on at least two sides to stay flat
- Rushing the drain — a sloppy drain cut is the first thing anyone notices
- Throwing out offcuts — save them; they become future replacement tiles for free
A planned layout around obstacles also makes the floor easier to keep organized afterward — the same zone logic we cover in garage organization planning.
FAQ
Do I need special tools to cut garage floor tiles?
For most 18-30 mm polypropylene tiles, a sharp utility knife and a straight edge are enough on straight cuts. Curves around posts and drains are faster with a jigsaw or hand saw; a rubber mallet helps seat the cut pieces.
Can I tile over a floor drain and keep it working?
Yes — cut a precise opening around the drain and keep the grate accessible. Never cover a drain you can't lift for cleaning, and keep the opening a few millimeters inside your mark the first time.
What happens if I cut a tile too small?
That piece becomes an offcut and you cut a new one. This is why obstacles justify ordering 10-15% extra tiles — and why testing with a cardboard template first is worth the two minutes.
Should I install tiles before or after my workbench?
Install the floor first and set the bench on the finished surface if you can. It's faster, the floor under the bench stays intact, and you avoid a fiddly cut line against the legs.
The Bottom Line
Obstacles don't rule out a tile floor — they just change the order you lay it. Plan for extra material, start from the obstacle or the most visible line, keep expansion gaps, and finish edges deliberately. Done well, the result looks like the floor was always meant to be there, posts and drains included.
Ready to plan your layout? Browse interlocking garage floor tiles and check the thickness options for your loads before ordering.


