


How to Install Garage Floor Tiles in Cold Weather
How to Install Garage Floor Tiles in Cold Weather
Autumn and winter are when most garage projects get done — the car is inside, the tools are out, and there's finally a free weekend. But cold changes how interlocking garage floor tiles behave during installation, and a few easy precautions make the difference between a floor that clicks together cleanly and one that fights you at every joint.
Here's what actually matters when the thermometer drops.

How Cold Affects Interlocking Tiles
Garage floor tiles are made from polypropylene, a material whose properties shift with temperature. In the cold:
- Tiles become stiffer. The plastic loses some flexibility, so the click connectors need more force to seat and feel less forgiving.
- Dimensions shrink slightly. Plastic contracts as it cools, which changes the fit along a run of tiles.
- The loop-and-tab joints tighten. Tiles that click together easily at 20°C can feel stubborn at 0°C — usually because the material, not the design, is resisting.
- Impact tolerance drops. Cold plastic is more brittle under a sharp blow than warm plastic, so heavy-handed hammering is the wrong technique.
None of this damages the tiles. It just changes the technique.
The Temperature Range That Works Best
Interlocking tiles remain installable well below freezing, but the process is easiest above roughly 5°C. Below that, plan on:
- Working in shorter sessions, so tiles don't sit outside in the cold for hours
- Warming the space first if you can — even a portable heater raises the garage a few degrees and softens the material noticeably
- Using a rubber mallet rather than force, tapping joints closed instead of levering them
If the garage is genuinely unheated and the forecast is extreme cold, it's still doable — thousands of floors go in this way every winter. Just accept slower progress.
Let the Tiles Acclimatise First
The single most useful habit: bring the boxes indoors the day before you install. A night at room temperature restores flexibility to the whole stack, and tiles that have been stored warm click together noticeably more easily.
If indoor storage isn't practical, at least stage the tiles you're about to lay indoors or beside a heater rather than pulling them straight from a cold delivery van. Working in small batches — carry in what you'll lay in the next 30 minutes — keeps the material cooperative.
Expansion Gaps Matter More in Winter
Interlocking floors are floating, not fixed: they need room to move with temperature. In winter installations this is doubly important, because the floor you lay cold will expand as the garage warms up in spring.
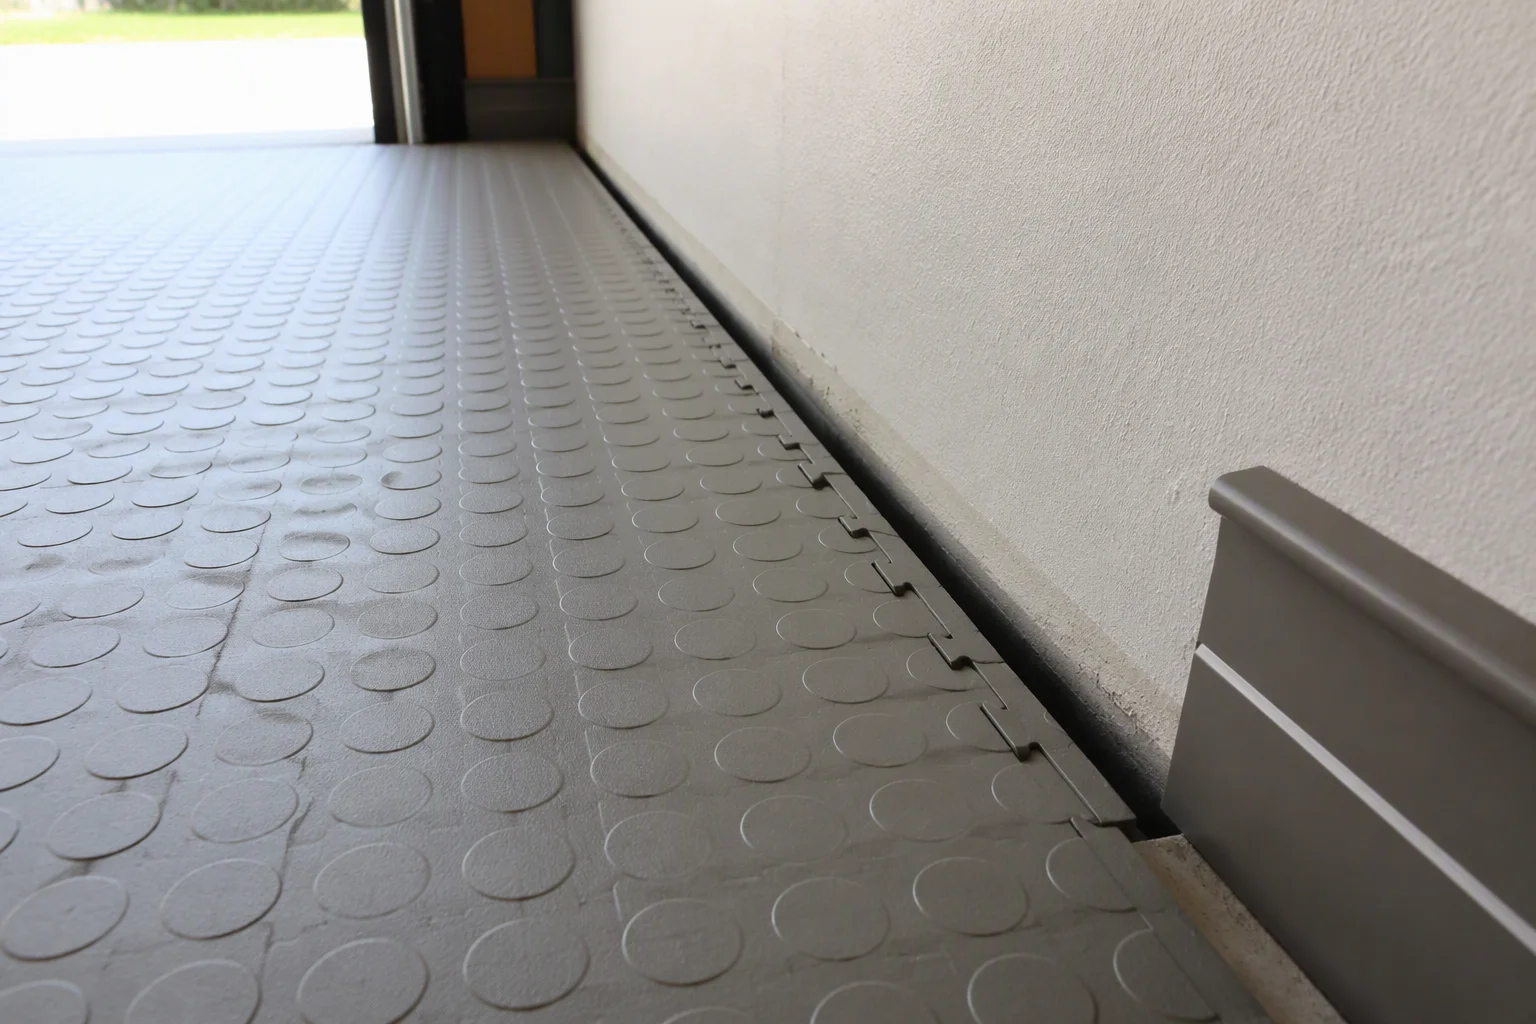
Practical approach:
- Leave a consistent gap where tiles meet walls, steps and posts — enough that the floor can expand without pressing hard against anything
- Don't butt tiles directly against a fixed obstacle including the wall, a threshold or a column
- Cover the gap with edge trim or a wall base so it looks intentional rather than unfinished
- If you're tiling around posts, drains or a step, plan those cut pieces with the gap in mind from the start — the fitting routine is covered in our guide to tiles around obstacles
Technique Adjustments for Cold Days
- Start from the centre of a wall in your main traffic direction, so any accumulated dimensional drift ends up hidden at the perimeter rather than in the middle of a walking line.
- Seat each connector with a rubber mallet, not by standing on the tile — distributed force closes joints cleanly without stressing the tabs.
- Lay in straight runs before branching out, and check every few rows rather than at the end, because cold-cut corners creep.
- Avoid forcing a joint if it resists. Lift the tile, check for a misaligned tab, and reseat it. Forcing cold plastic is how tabs get snapped.
- Pattern work needs extra care in the cold. If you're building a checkerboard or a border, dry-lay a section first so the layout is proven before you commit connectors — see our pattern installation guide.
Cold-Weather Installation Checklist
| Step | What to do |
|---|---|
| Night before | Move boxes indoors; sweep and check the slab |
| Before laying | Warm the garage if possible; carry in only the next batch of tiles |
| Layout | Mark centre lines and zones; confirm obstacles need cut pieces |
| Laying | Click runs together with a rubber mallet; never force a resistant joint |
| Perimeter | Leave a consistent expansion gap at every fixed edge |
| Finishing | Add edge trim; keep spare tiles indoors for future repairs |
Spare tiles are worth keeping warm and dry regardless of season — they're what make a future repair a five-minute job, as we explain in the guide to replacing a damaged tile.
Common Cold-Weather Mistakes
- Installing straight from a cold van — the stiffest possible tiles to work with
- No expansion gap — the floor has nowhere to go when the garage warms up
- Hammering joints hard — cold tabs are more likely to snap than to seat
- Leaving cut pieces until the very end — awkward trims are harder in a cold, stiff floor
- Under-ordering — cold-day cuts generate more waste; the 5–10% allowance in our quantity guide covers it
FAQ
Can garage floor tiles be installed below freezing?
Yes. The material stays workable, but it's stiffer and the joints need more patience. Warming the space and acclimatising the tiles indoors make the job considerably easier.
Will cold weather damage new tiles?
No. Polypropylene is designed for outdoor temperature swings, and a cold-laid floor performs normally once installed. The caveats are about technique during installation, not durability afterwards.
Should I wait for spring instead?
Only if you don't need the space this winter. A cold-weather installation done with proper expansion gaps and gentle joint seating is just as sound as a summer one.
Does a cold floor need bigger expansion gaps?
Leave a consistent perimeter gap at every fixed edge. A floor laid cold will expand as temperatures rise, so gaps prevent it from pressing against walls, posts and thresholds.
The Bottom Line
Cold weather doesn't rule out a winter installation — it just changes the routine. Warm the tiles indoors, warm the space if you can, seat joints with a mallet instead of force, and leave proper expansion gaps at every fixed edge. Do that and a January install behaves exactly like a June one.
Planning a cold-weather project? Tell us your garage size and temperatures and we'll advise on tile grade and quantity: browse garage floor tiles.
